Live view
The Live view page in the Hub streams the cameras connected to your account directly in the browser. It is the page you land on most often during day-to-day monitoring: every connected agent shows up as a tile, every tile streams its camera at the resolution your subscription allows, and a handful of controls let you talk back, switch quality, filter by site and pop a stream out to fullscreen.
The page is reachable from the main sidebar under Live view and
serves the route /livestream.

The Live view page lists every connected device in a grid. Each tile streams its camera live in either SD (MQTT/JPEG) or HD quality, where HD is delivered over WebRTC or HLS depending on how your Hub is configured.
How the streams reach your browser
The Hub never asks you to open ports on the network where your cameras live. Every tile exposes the same Preview/Live toggle, and the mode you pick selects how the video reaches the browser:
- Preview — MQTT snapshots. The agent encodes a low-resolution JPEG and publishes it over MQTT (TCP). The browser subscribes over secure WebSockets (WSS), so no port forwarding is required.
- Live — WebRTC (default). The full-resolution video is sent over WebRTC. NAT traversal is handled by the STUN/TURN infrastructure shipped with the Hub, so again no inbound ports need to be opened. This is the lowest-latency option and the only one that supports two-way talk.
- Live — HLS (firewall-friendly alternative). The full-resolution video is packaged as a rolling HLS playlist (fMP4/CMAF segments) that the agent pushes to the Hub; the browser plays it back over plain HTTPS. There is no peer-to-peer connection, no UDP and no STUN/TURN, so it works through even the strictest proxies — at the cost of a few seconds of extra latency compared with WebRTC.
Whether the Live mode is backed by WebRTC or HLS is a deployment-wide choice, not a per-tile one: an administrator sets it once on the hub-frontend (see Live over HLS below). The Preview/Live toggle itself behaves identically either way — when you flip a tile from Preview to Live, only the underlying stream component changes; the rest of the UI (camera name, controls, badges) stays in place.
All three paths share one rule: the camera network never needs an inbound port. The agent only ever makes outbound connections — to the MQTT broker, to its WebRTC peer (or the TURN relay) and to the Hub API — so Live view works behind NAT and restrictive firewalls. Each mechanism is broken down below.
Preview — MQTT snapshots
Preview is the default, always-available mode and the lightest on bandwidth. The agent encodes a low-resolution JPEG of each camera and publishes it to the MQTT broker over an outbound TCP connection; the browser subscribes to the same topic over secure WebSockets (WSS) and swaps the image as new snapshots arrive. There is no media session to negotiate, no UDP and no peer connection — just a periodic still image — so Preview works on every plan and through virtually any firewall. It is also the mode the grid falls back to whenever Live is unavailable or your subscription does not include the HD transports.
Live over WebRTC
WebRTC is the default Live transport and the lowest-latency option. The agent and the browser use the MQTT broker as a signalling channel to exchange SDP offers and ICE candidates, after which the full-resolution media flows peer-to-peer between them. When a direct peer connection cannot be established (symmetric NAT, restrictive firewalls), the media is automatically relayed through the Kerberos-hosted TURN servers. WebRTC is also the only mode that carries a back-channel for two-way talk.
Live over HLS
For deployments where WebRTC is impractical — locked-down corporate proxies that block UDP, environments without reachable STUN/TURN, or simply a preference for a single HTTPS delivery path — the Live mode can be served over HLS instead of WebRTC. Playback is then plain HTTPS through the Hub: no peer-to-peer connection, no UDP and no TURN relay.
HLS is enabled per deployment by setting the featureLiveStreamMode
environment variable on the hub-frontend to hls (the default is
webrtc). The change is transparent to the operator: the Preview/Live
toggle, the badges and the grid all look and behave exactly the same —
only the transport behind the Live tile differs.
Under the hood the HLS path is still driven over MQTT, exactly like the Preview and WebRTC modes:
- While a Live tile is on screen it periodically publishes a
request-hls-streamkeepalive to the agent. The agent only produces and ships the live stream while at least one viewer is asking, so idle cameras cost nothing. - Once the agent’s first segment has landed at the Hub it announces
receive-hls-readyover MQTT with a session id. - The browser then loads the rolling playlist
(
/storage/live/{device}/{session}/index.m3u8) into the player and keeps pulling new fMP4/CMAF segments over HTTPS. Every playlist and segment request carries the viewer’s bearer token and is only served to users who own the device.
Because the media is segmented rather than streamed peer-to-peer, HLS adds a few seconds of latency compared with WebRTC. Two-way talk is not available in HLS mode (it relies on the WebRTC back-channel), and the live statistics shown when you hover the blinking dot are reduced to resolution, bitrate and codec. Everything else — mute, fullscreen, PTZ and the status badges — works identically.
Filtering and searching
A control bar sits above the grid and lets you narrow the list of tiles to the cameras you want to watch:
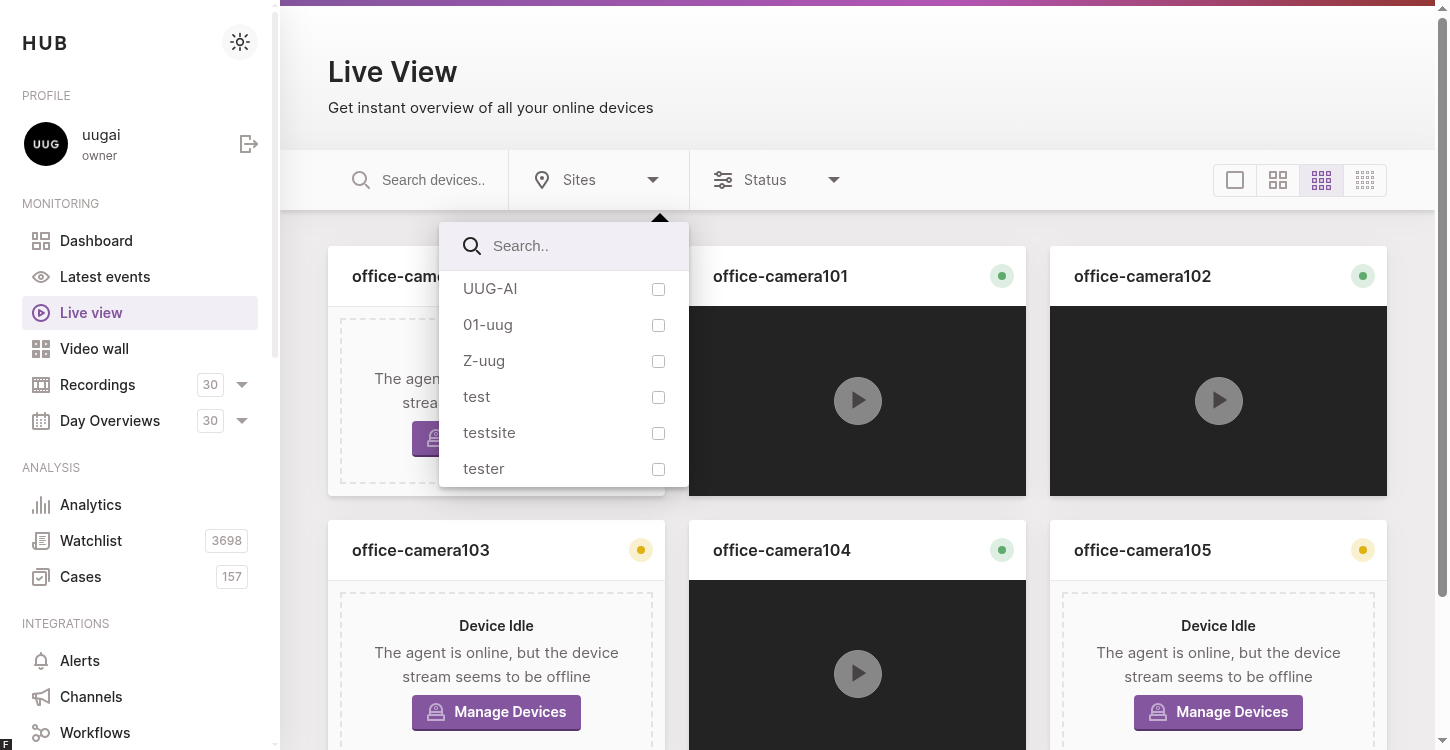
The filter bar above the grid lets you search by name, restrict the list to one or more sites, and filter on the device status (Active, Idle, Offline).
- Search — free-text search on the device name.
- Sites — restrict the grid to devices that belong to the selected sites. The dropdown shows the same site hierarchy as the rest of Hub.
- Status — keep only the Active, Idle or Offline devices. The three options show a live count next to their label so you can see at a glance how many cameras are in each state.
The number of devices currently visible is shown in the page title (“Live view (N)”). Filters update both the URL and the counter in real time.
Grid layout
The grid layout toggle on the right of the control bar switches between one, two, three and four columns. The selection is persisted in your browser, so the next time you open Live view the page reopens with the same density.
Use the column toggle to adjust how densely the streams are packed on the page. Fewer columns means bigger tiles; more columns means more cameras at a glance.
Pagination modes
The number of tiles rendered on a page is controlled by a few environment variables on the hub-frontend, so administrators can pick the mode that best fits their deployment:
- Scroll (default) — tiles are rendered in batches. A Load more
button at the bottom of the page appends the next batch on demand. The
page size is controlled by
featureLiveviewPageSize(defaults to 6). - Numbered pagination — when
featureLiveviewPaginationModeis set tonumbered, a classic page-number bar is shown at the bottom and you pick the page size from a dropdown (4, 8, 12, 16 or 25 streams). - Max streams — when
featureLiveviewPaginationModeis set tomaxStreams, the grid starts empty and you pick the devices to stream yourself, up to the cap defined byfeatureLiveviewMaxStreams(defaults to 25). This mode is useful on lower-end machines where decoding every connected camera at once would be too expensive.
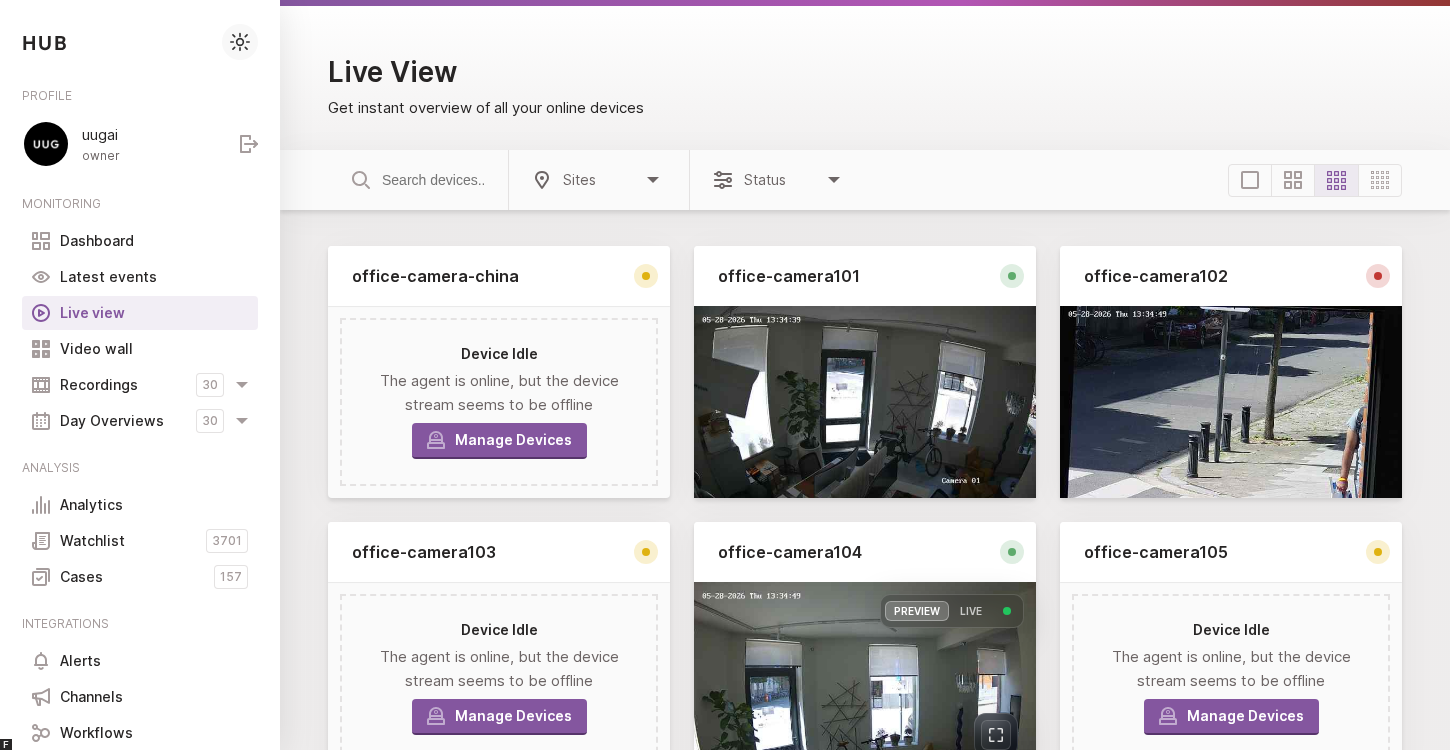
Reading a tile
Every tile shares the same three pieces of chrome: a header with the device name and a status badge, the live video itself, and a control bar that appears on hover.
Each tile header shows the device name (clickable, links to the device detail page) and a status badge driven by MQTT — Active, Idle, Alert or Offline.
Status badges
The badge to the right of the device name is driven by the messages the agent publishes over MQTT:
- Active (green) — the agent is connected and is currently streaming or processing motion.
- Idle (neutral) — the agent is connected but the device is configured as inactive (for example outside of its schedule).
- Alert (red) — motion was detected on this device in the last 30 seconds. The badge automatically returns to Active once the motion window expires.
- Updating / Reconnecting (blue) — the agent has lost its MQTT connection. Click the badge to jump to the device’s detail page and troubleshoot the connection.
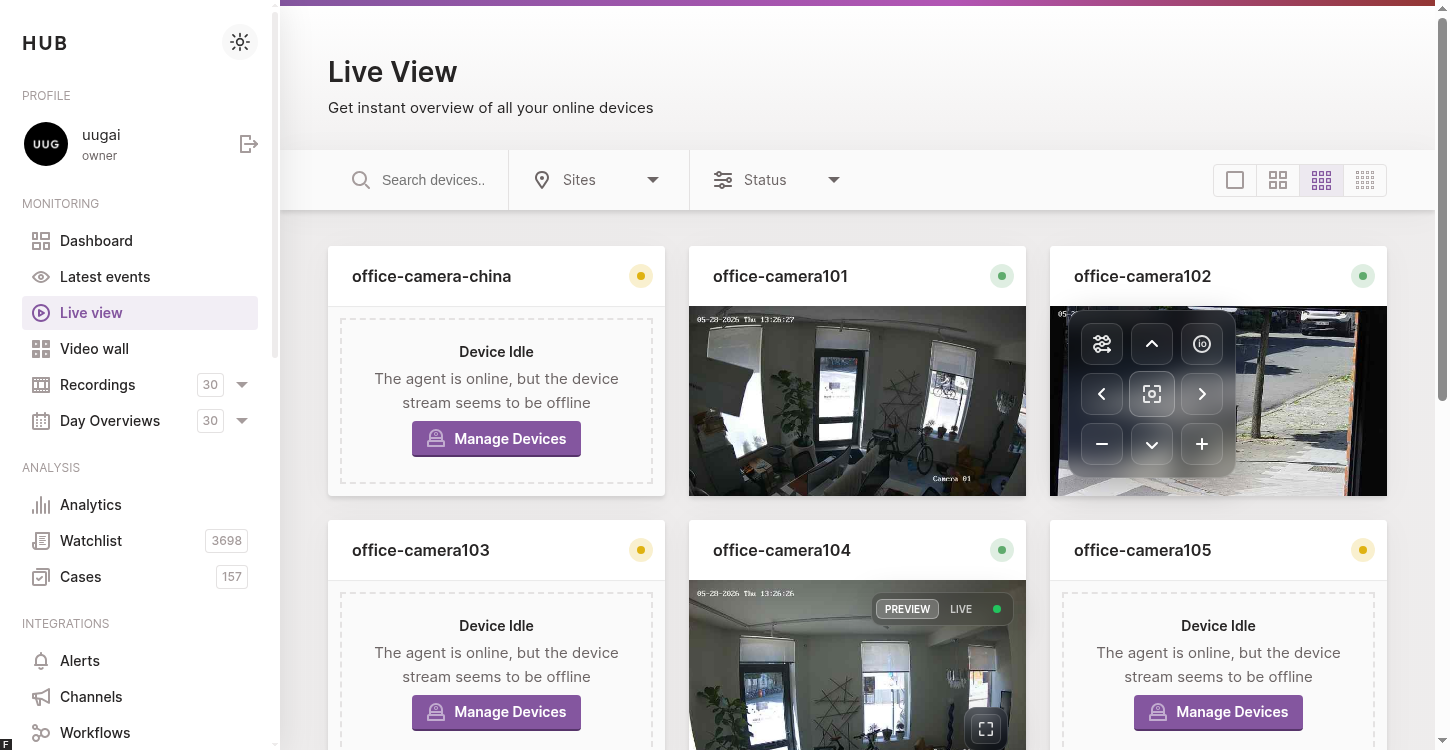
Stream controls
Hovering a tile reveals the control bar at the bottom and the quality switcher at the top. These controls stay hidden when you are not interacting with the tile so they don’t obscure the picture.
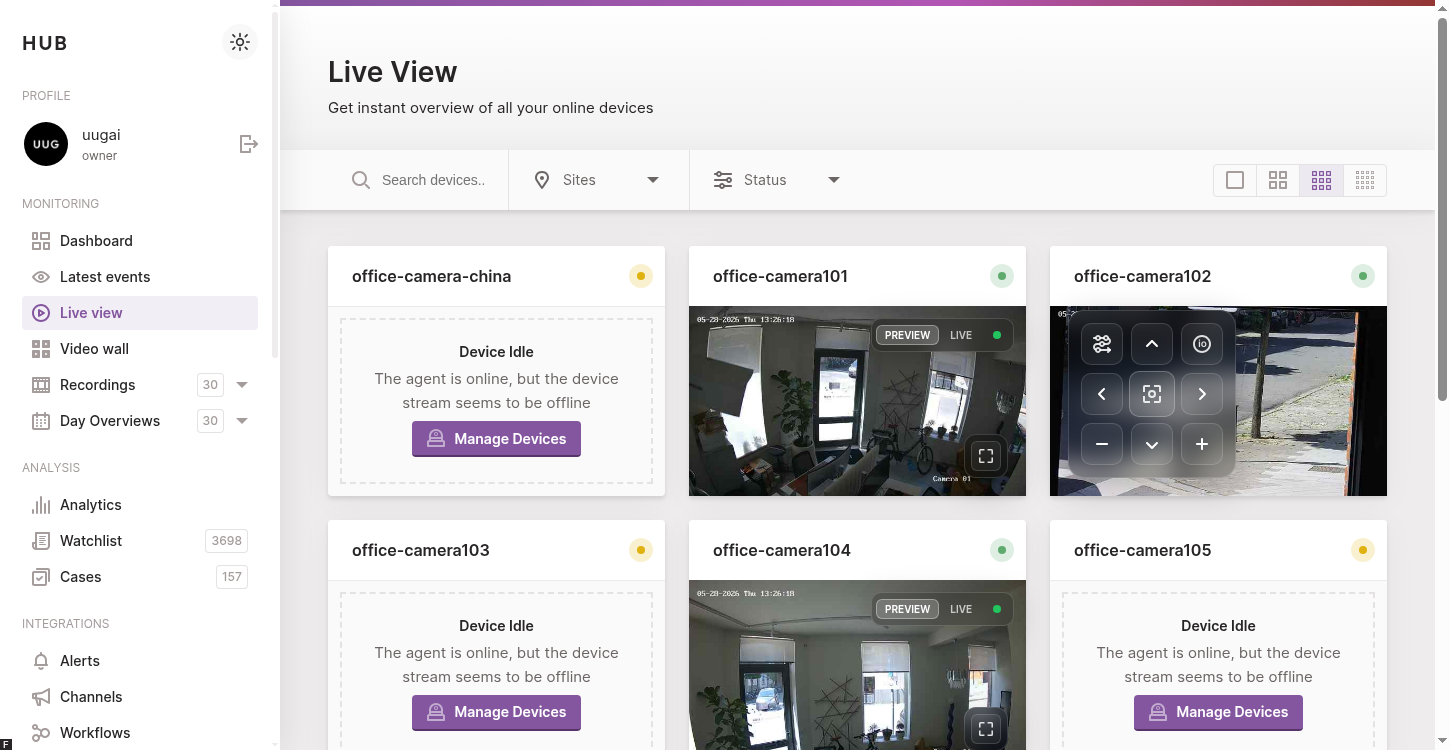
Hover a tile to reveal the Preview/Live switcher (top), and the talk, mute and fullscreen controls (bottom). The blinking dot reports the health of the underlying stream.
- Preview / Live — switches the tile between the MQTT snapshot transport (Preview) and the real-time HD transport (Live). Depending on how the Hub is configured, Live is delivered over WebRTC (default) or HLS. Live requires a Gold subscription or higher; when your plan does not include Live the button is shown disabled with a tooltip explaining the upgrade path. The little blinking dot next to the switcher reports the health of the running stream — hover it in Live mode to see the live statistics: the full WebRTC set (resolution, FPS, bitrate, codec, RTT, jitter, packets lost, …) on WebRTC deployments, or resolution, bitrate and codec on HLS.
- Talk — only shown when the agent reports a back-channel (ONVIF audio output or a compatible camera) and the tile is in Live over WebRTC. Press and hold to send your microphone audio to the camera’s speaker. The surrounding volume bar visualises the level you’re sending. Talk relies on the WebRTC back-channel, so it is unavailable when the Hub is configured for HLS.
- Mute / Unmute — only shown in Live. Toggles the audio track of the incoming stream.
- Fullscreen — pops the tile out to a fullscreen overlay. Double clicking the tile is a shortcut for the same action. Press Escape or click the Exit fullscreen button to return to the grid.
PTZ overlay
When the device has ONVIF enabled and your role grants the PTZ permission, an additional overlay is rendered on top of the stream:
- A pan/tilt joystick in the centre of the tile lets you reposition the camera. Hold Shift while dragging for finer control.
- A zoom slider on the side controls the optical zoom.
- A presets dropdown lists every preset configured on the camera, so you can jump back to a known position in a single click. Selecting Save preset records the current position under a new name.
- A digital I/O menu exposes the relays the camera advertises over ONVIF — useful to trigger an alarm, open a gate or switch a light from the same view.
Each individual feature can be turned off per role from the Roles configuration page (see the roles documentation).
Empty and offline states
A tile that cannot show a video falls back to a friendly placeholder explaining why:
- Camera offline — the agent reports the camera as disconnected. The tile links to the device detail page so you can review the agent configuration.
- Live view disabled — your role (or the device’s role override) does not grant the Live view permission. The tile shows a lock icon and a link back to the Manage devices page.
- Stream paused — the tile is currently out of the viewport. Hub pauses tiles that are not on screen to save CPU and bandwidth, and resumes them automatically when you scroll back.
When the whole account has no connected device yet, the page collapses to a single placeholder that walks you through connecting your first agent.
Subscription requirements
Live view is available on every paid plan. The features it exposes are gated by the subscription level:
- Free / no plan — Live view is hidden. An Info banner at the top of the page invites the user to subscribe.
- Below Gold — only the Preview (MQTT) transport is available. The Live toggle is shown disabled with a tooltip linking to the subscription page.
- Gold or higher — both Preview and Live transports are available. On WebRTC deployments this also includes two-way talk and the full live WebRTC statistics; when the Hub is configured for HLS, Live is available at the same Gold tier but without two-way talk.
The relevant subscription level for a given account is loaded once at sign-in and applied to every tile on the page.
Troubleshooting
If a tile stays black or never leaves the Connecting state:
- Confirm that the agent is shown as online on the Devices page. A red dot there means the MQTT connection to Hub is broken and Live view cannot work either.
- Switch the tile to Preview to check whether MQTT alone works. If Preview works but Live does not, the issue is on the WebRTC path (firewall, STUN/TURN reachability).
- Hover the blinking dot on a Live tile to read the live WebRTC stats. A persistent high Packets Lost or RTT indicates a network issue between the agent and the TURN server.
- Reload the page. The component will renegotiate every running stream, which often resolves transient MQTT or WebRTC glitches.
On Hubs configured for HLS the Live path is plain HTTPS rather than
WebRTC, so steps 2–3 do not apply. Instead, confirm that the browser can
reach the Hub API over HTTPS (the live playlist is served from
/storage/live/...) and that your session has not expired — an expired
token makes the authenticated playlist and segment requests fail.
For deeper diagnostics, the browser’s developer tools expose the same console logs as the rest of the Hub app — every stream lifecycle event is tagged with the device key, which makes it easy to filter the noise.