Cases
By default, recordings are persisted for a limited amount of time. Within Hub you define a retention period per subscription and assign it to a user. The retention period can be set to 30, 60, 90 days or any custom value. It determines how many days of footage are visible to the end-user after login, and controls when the associated recordings metadata are removed from the database.
Cases are the mechanism in Hub to keep important recordings beyond that window. Creating a case copies its recordings from the current storage provider to a dedicated archive provider in Vault, which has its own (typically longer or non-expiring) retention period — for example, 3 years or more.
Note: The current archiving feature is designed for individual recordings only. It is not suitable for bulk exports or archiving large volumes of data (e.g. terabytes). We are aware of this limitation and are actively working on a solution to support large-scale archiving and export in a future release.
Introduction
The cases page is reachable from the main sidebar, under Cases. It lists every case in your account together with the recordings attached to it, the assignee, and any labels.
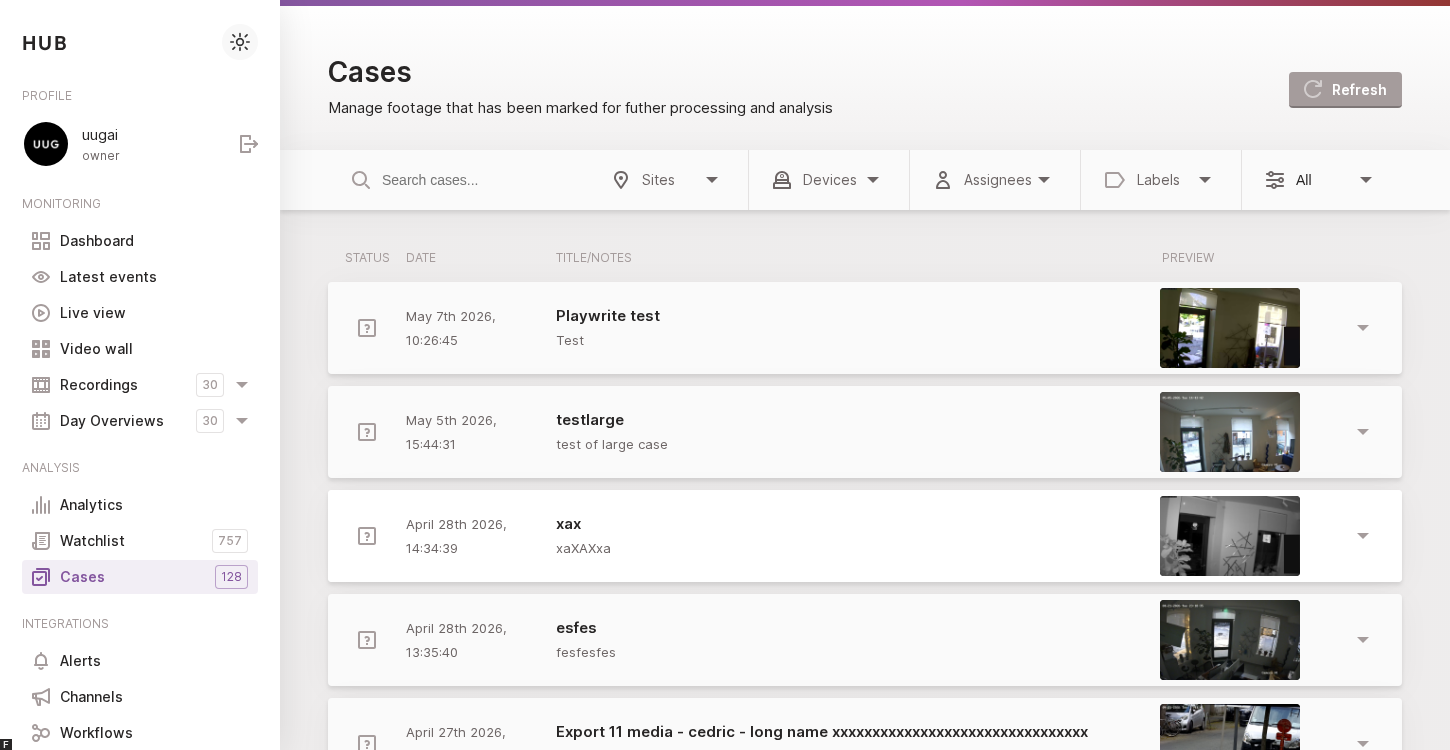
The cases overview lists every case in your account.
Selecting a row expands the case in place so you can review the attached recording, edit the title and description, manage labels, and add comments without leaving the page.
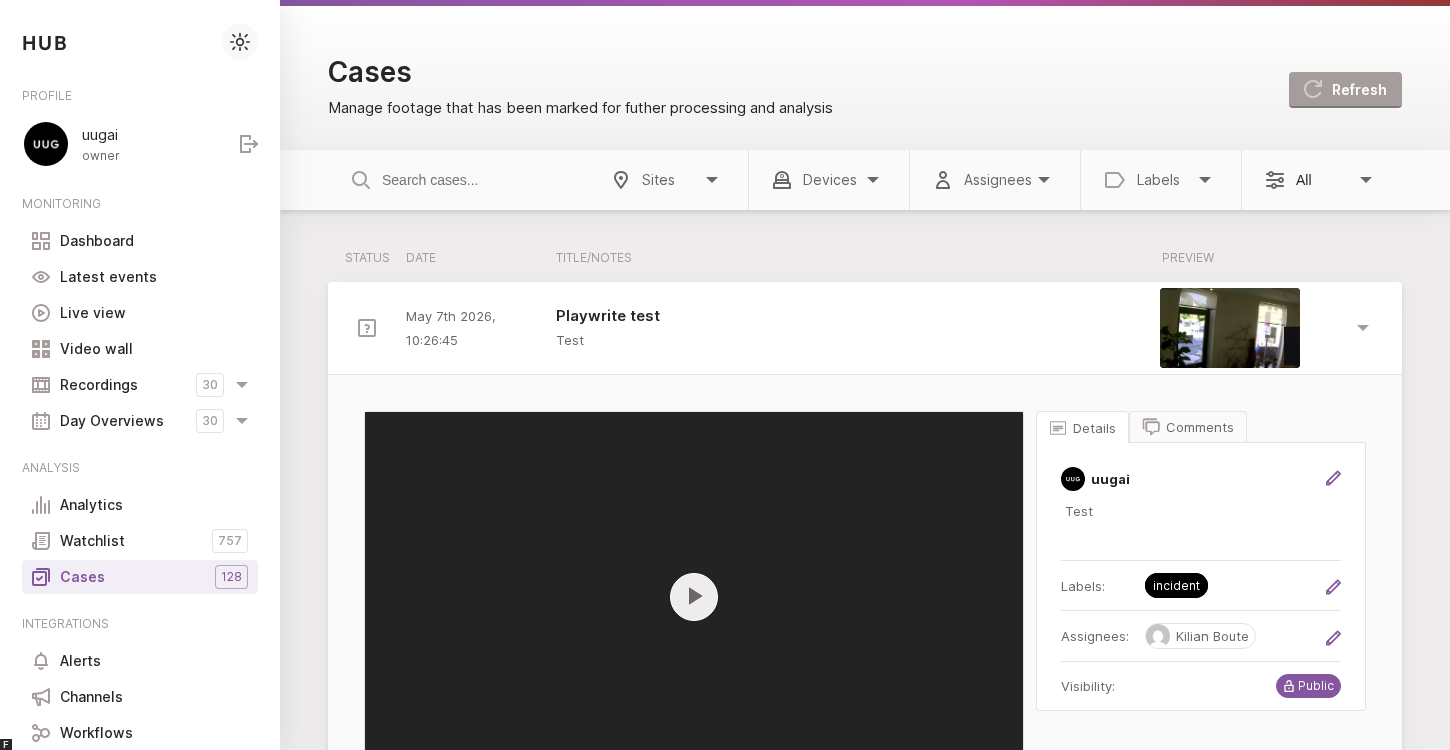
Open a case from the list to inspect the recording and follow up on it.
Case statuses
Every case has one of three statuses, shown as an icon at the start of the row in the overview:
- Open — the default status of a freshly-created case. Use it for cases that still require follow-up.
- Approved — the case has been reviewed and confirmed (for example a real incident).
- Rejected — the case has been reviewed and dismissed (for example a false alarm). The archived recordings remain available, but the case is marked as not relevant.
The status can be changed at any time from the action bar of the expanded case or from the Actions menu of the dedicated case detail page (see Status transitions below). The current status drives which buttons are shown — for example, Approve disappears once the case is already approved.
Filtering and searching the overview
A filter bar sits above the list and lets you narrow the cases down:
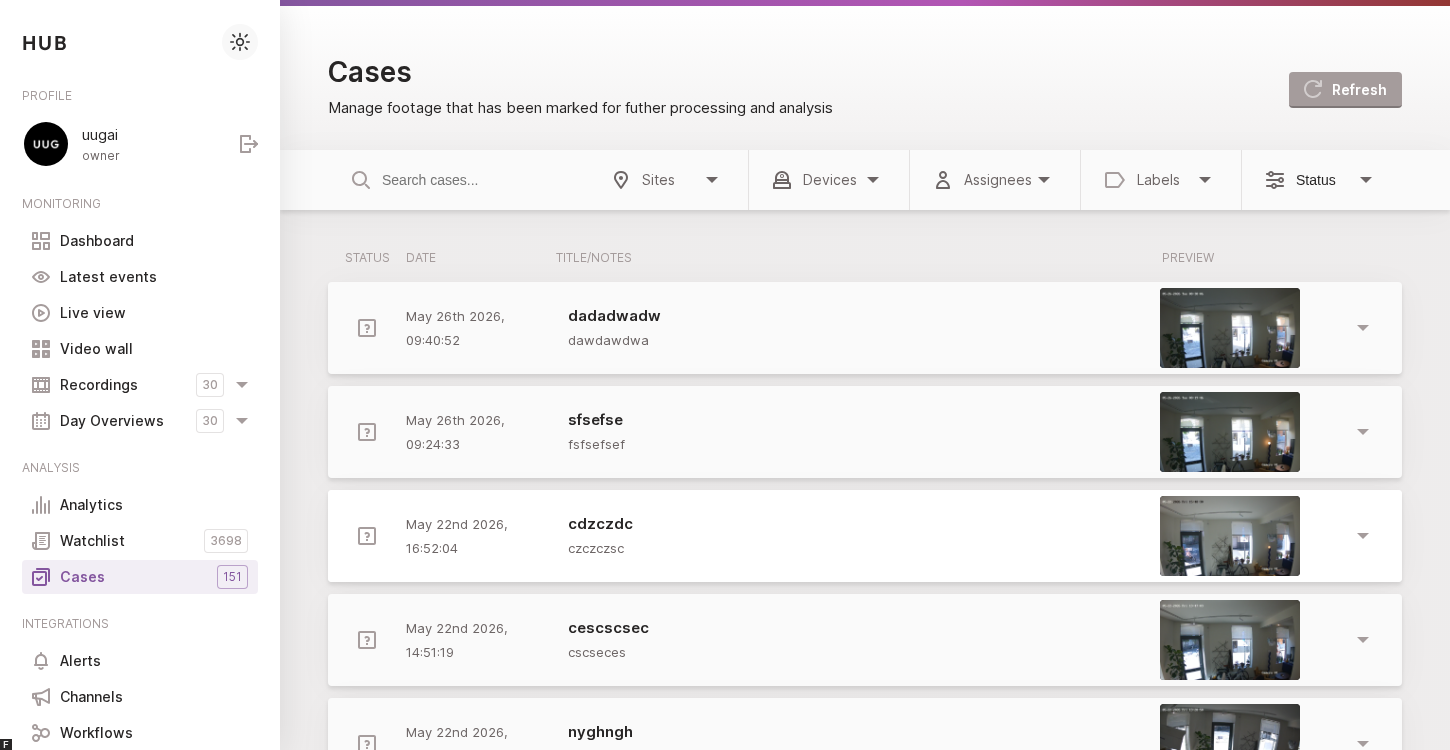
The filter bar above the cases overview lets you search and narrow down by site, device, assignee, label or status.
- Search — free-text search on the case title.
- Sites / Devices — restrict the list to cases whose recordings come from the selected sites or devices.
- Assignees — only show cases assigned to the selected users.
- Labels — only show cases tagged with at least one of the selected labels. Clicking a label on an expanded case applies the same filter.
- Status — switch between All, Open, Approved and Rejected (the default is Open).
The Refresh button in the page header reloads the list with the current filters applied.
Creating a case
Cases are always created from a recording. The fastest way is to start from
the Recordings page (/media) and create the case directly from the
recording you want to archive.
- Open Recordings in the sidebar.
- Click on a recording to open its side panel on the right.
- In the panel header, open the Actions dropdown (top-right).
- Choose New case to open the New case modal.
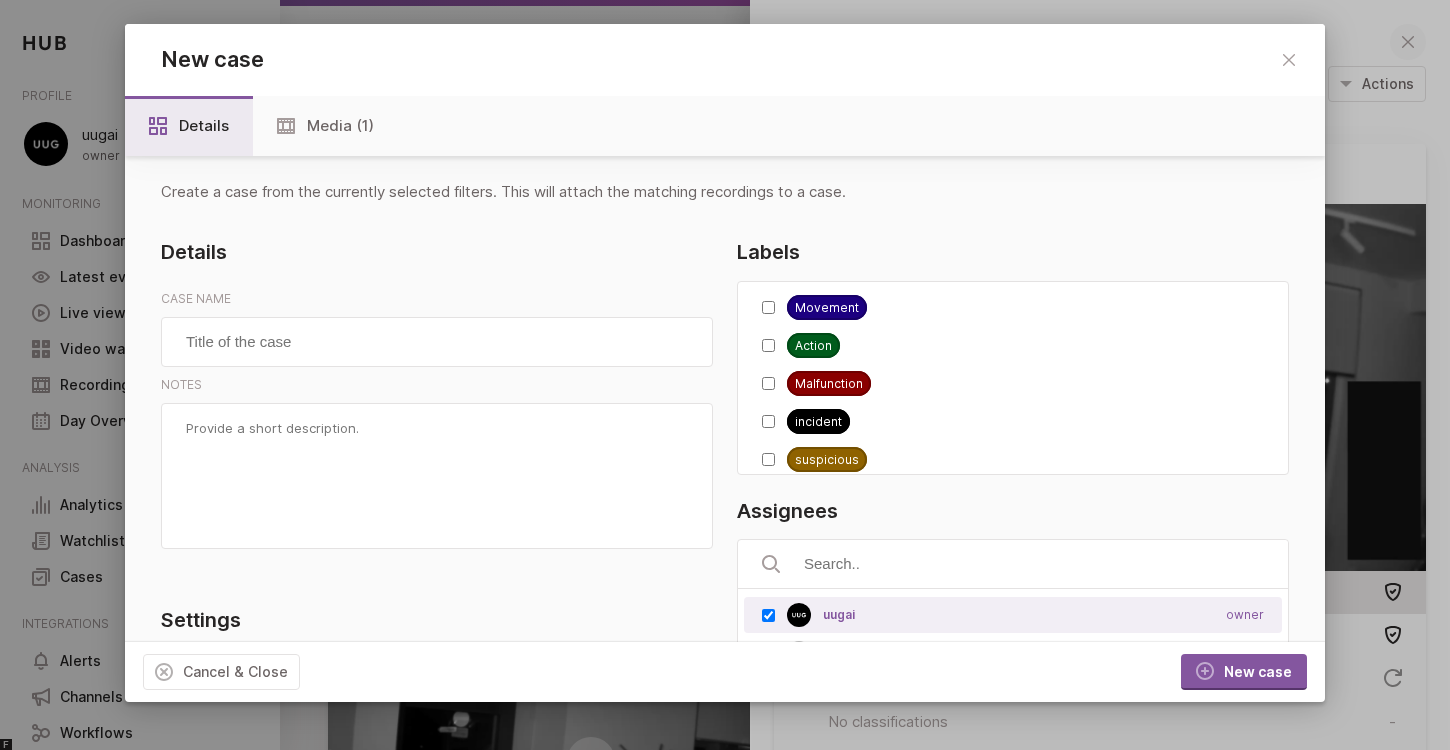
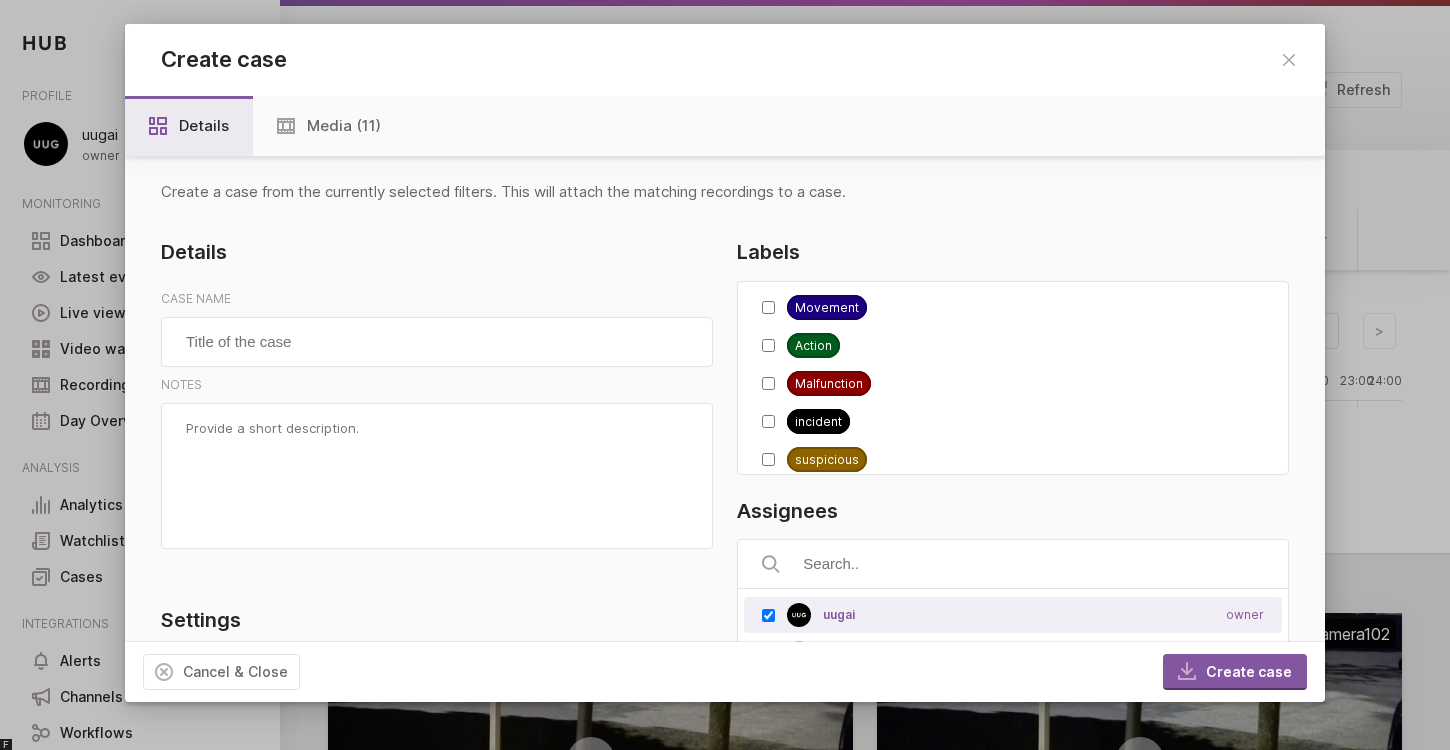
The New case modal, opened from the Actions menu of a recording.
The modal has two tabs — Details and Media — and the following fields:
Details
- Case name (required) — a short, descriptive title for the case. This is the title shown in the cases overview and in any notification sent to assignees.
- Notes — free-form description used to capture context about why the recording is being archived (incident reference, observations, follow-up actions, …).
Settings
Retention date (optional) — picks the date at which the case itself is automatically cleaned up from Hub. When left empty, Hub falls back to the default retention window (365 days from creation, configurable on the hub-api with the
DEFAULT_TASK_RETENTION_DAYSenv var). Picking a date here explicitly overrides that default — useful when a case needs to be preserved longer (for example for an ongoing legal hold) or, on the contrary, can be removed earlier than the account default.This field controls only the Hub-side case lifetime. The retention of the underlying archived recordings is governed separately by the Vault archive account (see Configuration below).
Notify assignees — when enabled, the assignees you select below receive a notification as soon as the case is created.
Keep this case private — restricts visibility of the case to its assignees only. Other users in the account will not see the case in the overview.
Labels
- Labels — pick one or more labels to categorise the case (for example intrusion, false alarm, insurance). Labels can be filtered on from the cases overview.
Assignees
- Assignees (required) — the users responsible for following up on the case. The current user is selected automatically; add or remove members as needed.
Media
The Media tab shows the recordings that will be attached to the case. When the modal is opened from a recording’s side panel, that recording is pre-selected. You can review the preview and remove individual recordings before creating the case.
Once all required fields are filled in and at least one recording is attached, click New case in the bottom-right of the modal to create it. The recording is then queued for archiving to the Vault archive provider you configured below.
The same New case modal is also reachable from two other places: the Recordings page header (for bulk creation from the active filters) and the Watchlist (one-click Add Case on a notification). Both are described below.
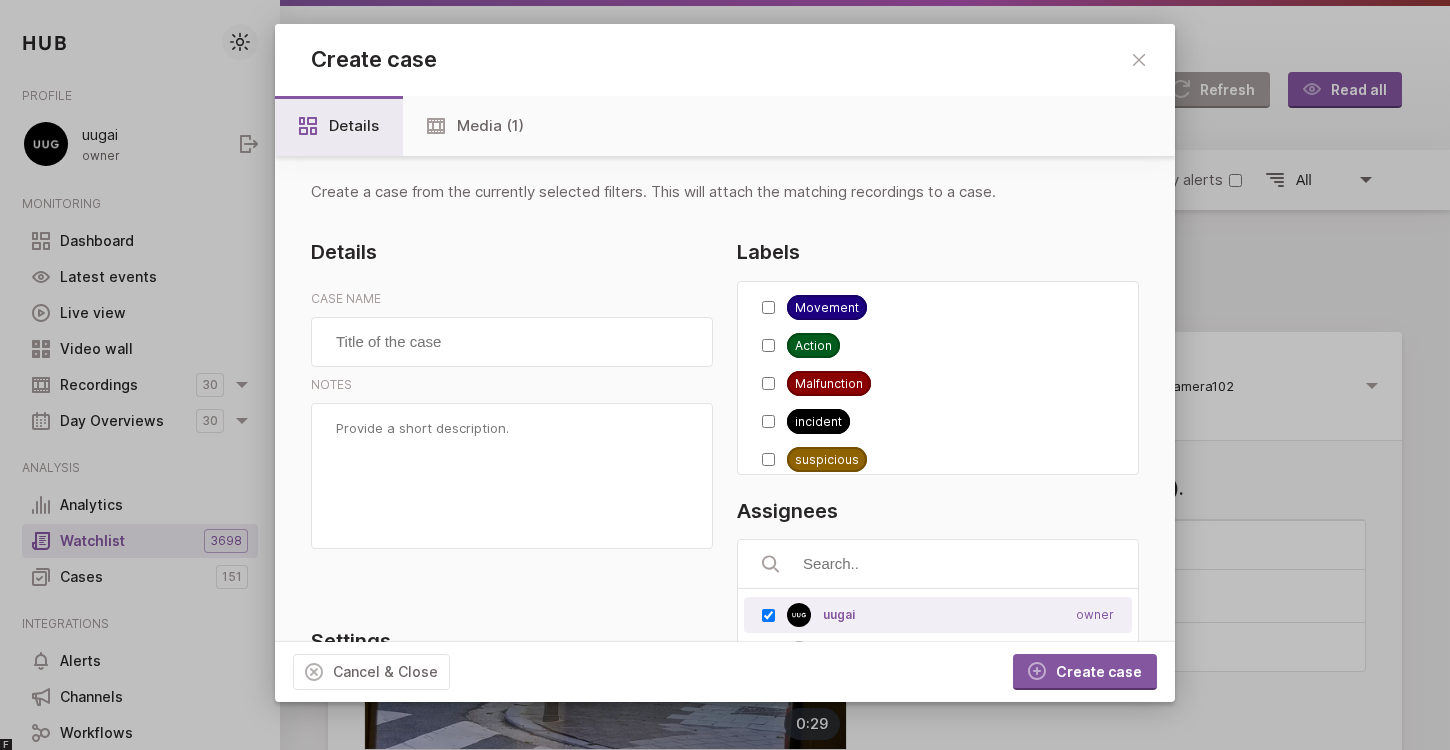
Creating a case in bulk from the Recordings page
The single-recording flow above is convenient when you already know which recording you want to archive. When the event of interest covers a longer time window — or when you want to archive every recording from a given device on a specific day — the Recordings page lets you create a case in bulk from the active filters.
- Open Recordings in the sidebar.
- Pick a date in the date picker.
- Optionally narrow down by device or site in the filter bar.
- Drag the timeline at the bottom to the time window you want to
archive (the from and to selection updates the URL — for example
/media?date=2026-05-07&from=1262&to=2574&devices=camera2). - Click the Create case button in the page header (next to Clear filter and Refresh).
The same New case modal opens with every recording matching the active filters pre-attached on the Media tab.
The Create case modal opened from the Recordings page header. Every recording matching the active filters (date, device, time range) is attached to the new case in one go.
Note: To keep cases manageable, the Create case button is disabled when 1000 or more recordings match the current filters. Refine the date, device or time range before retrying.
Creating a case from the context overlay
Sometimes a single recording is not enough — you may want to archive the moments leading up to and following an event. The View Context action, also available from the Actions dropdown of a recording’s side panel, opens a wider time window of recordings around the selected one.
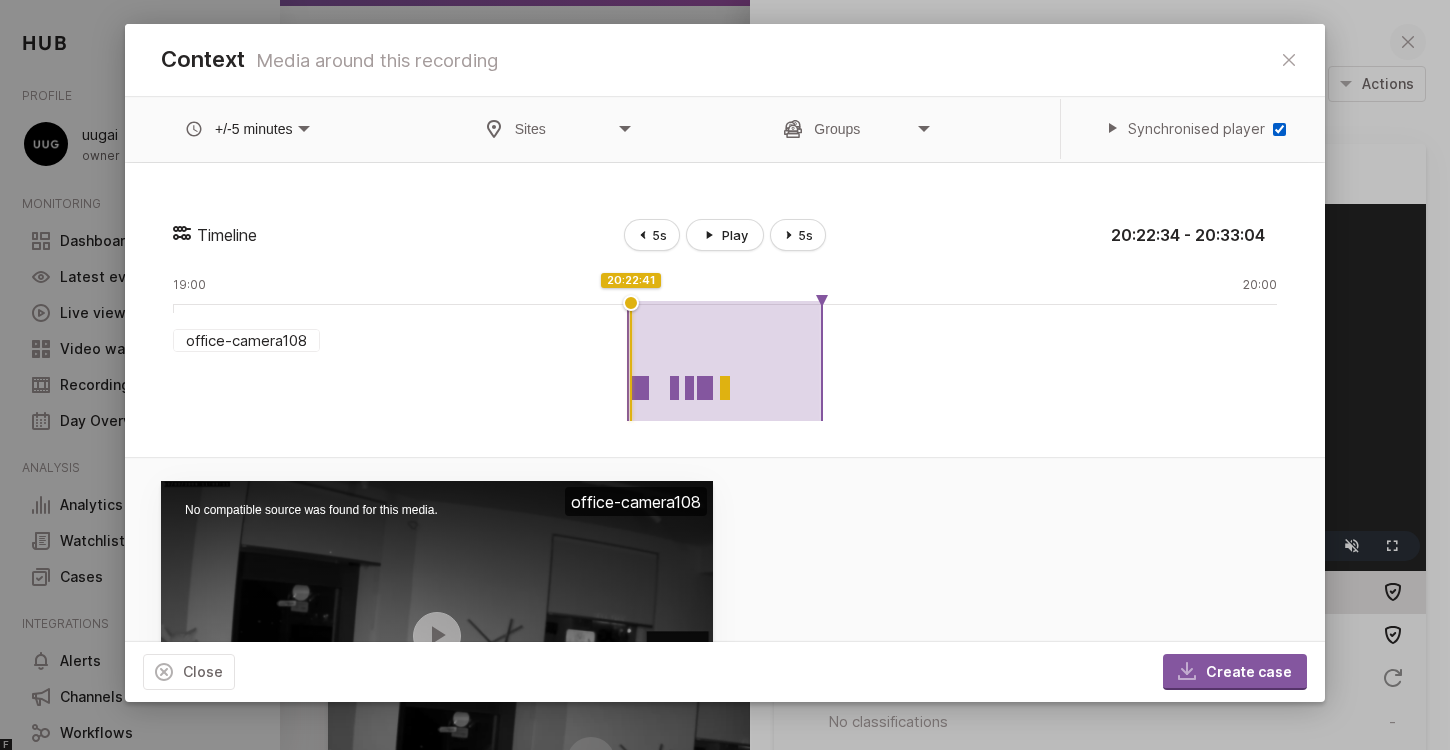
The Context overlay loads recordings before and after the selected one on a shared timeline.
In the overlay you can:
- Pan and zoom the timeline at the bottom to navigate the surrounding recordings.
- Use the filters (time offset, site, group) to broaden or narrow the set of recordings shown.
- Click Create case in the bottom-right of the overlay to open the same New case modal described above, pre-filled with the recordings currently in scope. The fields and validation rules are identical to the standard flow.
This is the recommended way to create a case when the event you want to archive spans multiple recordings or you need extra context before and after it.
Adding a recording to an existing case
Instead of creating a brand-new case, you can attach a recording to a case that already exists. From the same Actions dropdown of a recording’s side panel, choose Add to case.
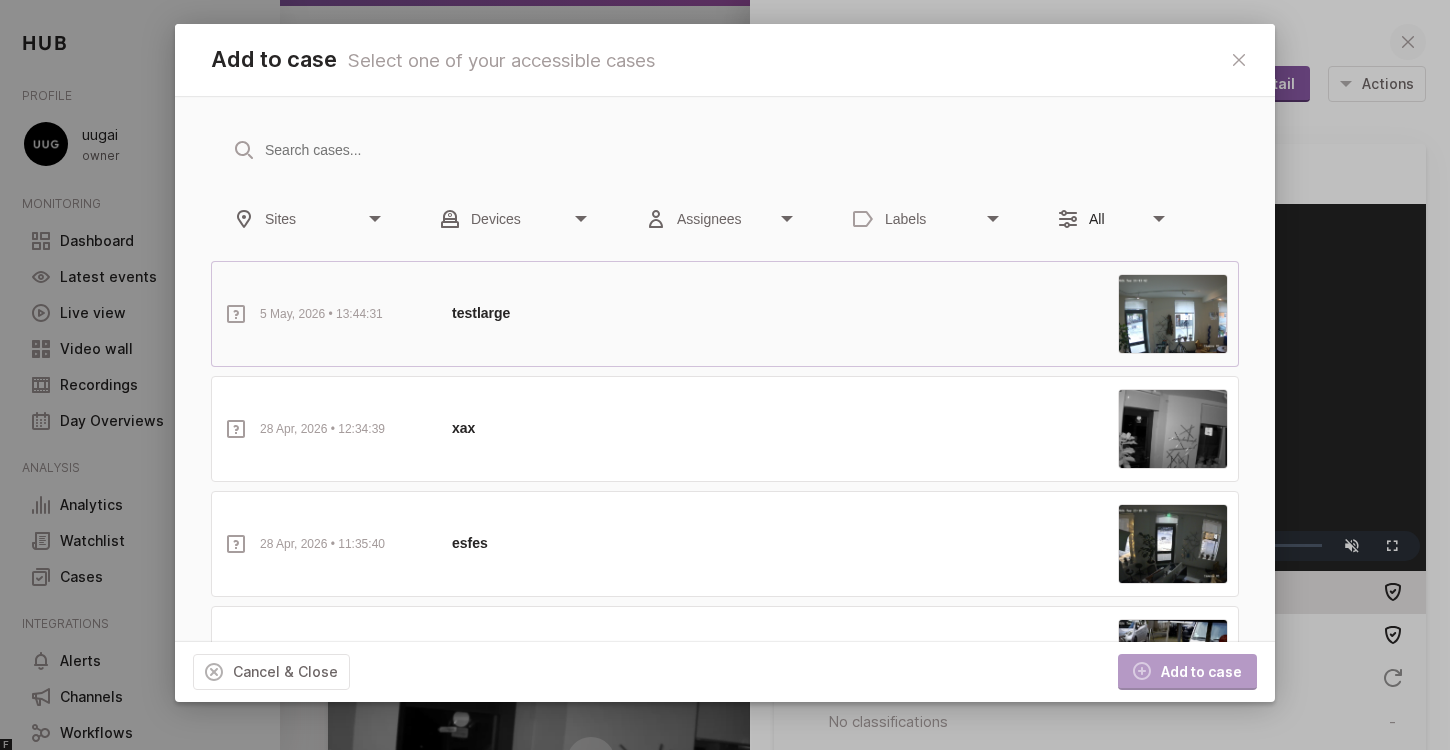
The Add to case modal lists every case you have access to and lets you filter by site, device, assignee, label or status.
The modal lists every case you have access to. To find the right one, you can:
- Search by case title in the search field at the top.
- Filter the list using the same dropdowns as the cases overview (sites, devices, assignees, labels, status).
Click a case in the list to select it (the row becomes highlighted), then press Add to case in the bottom-right of the modal. The recording is appended to the selected case and queued for archiving alongside the recordings already attached to it.
Creating a case from the Watchlist
The Watchlist is the inbox of notifications generated by your pipeline (motion, intrusion, ANPR, …). Expanding a notification row reveals an Add Case action that opens the New case modal pre-filled with the recording the notification refers to — the fastest path to archive a recording from an event you were notified about.
The Create case modal opened from a Watchlist notification, pre-filled with the recording the notification refers to.
Working with an open case
Selecting a row in the cases overview expands the case in place. The expanded view is split in two columns: the video column on the left plays the recordings attached to the case, and the details column on the right groups the metadata, comments and additional files.
Playlist and attachments
The details column has two tabs at the top:
- Playlist — lists every recording attached to the case. Selecting a
row loads it in the player, and the Autoplay next toggle continues to
the next recording when the current one ends. Two checkbox columns —
E (Include in export) and S (Include in share) — let you
decide per recording whether it should be part of the next generated
export bundle and whether it should be visible to people you share the
case with. The header row toggles every recording at once. The
three-dots menu on each row exposes per-recording actions:
- Open media detail — opens the recording’s full detail page.
- Edit video — opens the editor on that recording.
- Attachments — additional files attached to the case (PDF reports, photos, witness statements, exported clips, …). Files can be added by clicking the Upload button or by dragging them onto the panel. Once uploaded, every attachment can be renamed or deleted from the row’s inline actions, and the same E / S checkboxes as on the playlist let you include or exclude each attachment from the next export bundle and from shared links.

The Attachments tab lets you add supporting files to a case via drag-and-drop or the upload button.
Note: Cases created before the per-row selection was introduced (“legacy cases”) show every E and S checkbox as checked and disabled. Their export bundle and shared link include every attached item, just like they did before — no migration step is needed.
Details, labels, assignees and retention
The lower part of the details column gathers the case metadata:
- Description — the reporter (the user who created the case) can edit the description in place by clicking the pencil icon next to their name.
- Labels — labels can be added or removed using the pencil icon next to the labels row. Clicking a label filters the cases overview on it.
- Assignees — the list of users responsible for following up. The notify assignees toggle and the pencil icon are only shown to users allowed to manage the case (see Permissions below).
- Visibility — switches the case between Public (visible to all users in the account) and Private (visible to its assignees only). Same permission rules as the assignees.
- Retention — shows when the case will be automatically removed from
Hub, based on the Retention date picked at creation or the
DEFAULT_TASK_RETENTION_DAYSfallback (see Creating a case above). No expiry set is shown when the case is kept indefinitely.
Comments
The Comments tab on the right of the Details tab keeps a chronological log of the discussion around the case. Every assignee — and every user with access to the case — can post a comment from the input at the bottom of the tab.
Permissions
Some controls on the expanded case are only available to specific users. These checks mirror the same rules applied by the API:
- Manage membership — toggling the visibility, editing the assignees list and changing the notify assignees flag is restricted to the case’s reporter, account admins and the account owner.
- Delete the case — the Delete button at the bottom of the open case is only shown to the case’s reporter, account admins and the account owner.
Other users keep read-only access to the same information: they can play the recordings, browse the attachments, read the description and post comments, but cannot change the case’s membership or delete it.
Action bar and status transitions
The bottom of the expanded case exposes an action bar split in two halves:
Left side — case-wide actions
- Delete — removes the case (see Permissions above).
- Generate export / Regenerate export — queues a background job
that bundles every recording and attachment currently flagged
Include in export (see Playlist and attachments above) into a
single
.ziparchive. The label and state of the button track the job:- Generate export — no bundle has been built yet for this case.
- Generating export… N% — the worker is running; the button is disabled and shows the percent progress.
- Regenerate export — a bundle already exists. The button is enabled when the selection has changed since the last build (stale) and disabled when the bundle still matches the current selection (fresh).
- Retry export — the last run failed; clicking re-queues the job.
- Download — once a bundle exists, downloads the latest generated
.zipfrom storage. Only shown after the first successful export. - Open sequence — when the case was created from a sequence of recordings, jumps to the corresponding entry on the Recordings page.
- Open detail — opens the dedicated case detail page (see Case detail page below).
Right side — status transitions
- Open case — re-opens the case (visible when the case is currently Approved or Rejected).
- Reject — marks the case as Rejected.
- Approve — marks the case as Approved.
Changing the status updates the icon on the row in the cases overview and is recorded in the case activity log.
Case detail page
In addition to the inline expanded view, every case also has a dedicated
detail page reachable at /cases/<id> (or via the Open detail button
in the action bar). It shows the same playlist, attachments, details and
comments, but in a full-page layout that is better suited to long
investigations and to sharing the URL with co-workers.
The dedicated case detail page. The Actions menu in the top-right gathers every case-wide operation: reopen, approve, reject, open sequence, generate/regenerate export, download, share and delete.
The page reuses the Details and Comments tabs from the inline view and adds an Actions menu in the top-right of the page header. The menu gathers every case-wide operation in one place:
- Reopen / Approve / Reject — same status transitions as the inline action bar.
- Open sequence — only shown when the case was created from a sequence.
- Generate export / Regenerate export — same export-bundle trigger as on the inline action bar, with the same generating / stale / fresh / failed state machine.
- Download video — downloads the latest generated
.zipbundle (only shown once an export has been produced). - Share case — opens the Share case modal described below.
- Delete — removes the case. Note that on the detail page Delete is restricted to account admins and the account owner — the case’s reporter cannot delete from here, only from the inline action bar.
Exporting a case
An export is a single downloadable .zip bundle containing the
recordings and attachments of a case. Exports are built on demand by the
hub-pipeline-export worker and stored on the Vault archive provider
configured for the account, so they are available for download as long
as the case itself exists.
How an export is built
Triggering an export from the UI doesn’t build the bundle synchronously:
Hub hands the work off to the hub-pipeline-export worker through the
message broker, the worker streams the selected media from Vault into a
temporary directory, compresses it, and uploads the resulting .zip
back to Vault. The Hub UI tracks progress on the task record and reveals
the Download action once a fresh bundle is available.
The top row is the request path: the browser kicks off a job on
hub-api, which enqueues it on RabbitMQ for the hub-pipeline-export
worker to pick up. The bottom row is the data plane: hub-api only
flips the task status in MongoDB, while the worker reads the current
Include in export selection from MongoDB, streams the matching media
out of Vault, compresses it locally, uploads the resulting .zip back
to Vault and writes the new compressed_url onto the task. The UI then
polls the task, flips from Generating… to Fresh, and reveals the
Download action that streams the bundle straight from Vault.
Curating what goes into the bundle
Before triggering an export, use the E (Include in export)
checkboxes in the playlist and attachments panel of the case to decide
which items end up in the .zip:
- Playlist E column — each recording attached to the case can be individually included or excluded.
- Attachments E column — each uploaded file can be individually included or excluded.
- Header checkbox — toggles every row of the panel at once, which is handy when you want to start from “all in” or “all out” and then fine-tune.
Toggling any checkbox marks the case’s export as stale (see State machine below), which re-enables the Regenerate export button so the next bundle reflects the new selection.
Legacy cases: cases created before per-row selection was introduced show every E checkbox checked and disabled. Their export keeps the previous “include everything” behavior; no migration step is needed.
Triggering a build
The export can be triggered from two equivalent places:
- The Generate export / Regenerate export button on the action bar at the bottom of the inline expanded case.
- The Generate export / Regenerate export entry in the
Actions menu on the dedicated case detail page (
/cases/<id>).
Both push a job to the hub-pipeline-export queue. The worker copies the
selected recordings from the archive provider, packages them together
with the selected attachments into a single .zip, uploads the bundle
back to Vault, and updates the case so the Download button can serve
it.
State machine
The export button label and enabled state track the case’s current export status:
| State | Label | Enabled | Meaning |
|---|---|---|---|
| none | Generate export | ✓ | No bundle has ever been built for this case. |
| generating | Generating export… N % | ✗ | The worker is running; the percentage is live progress. |
| fresh | Regenerate export | ✗ | A bundle exists and matches the current selection — nothing to do. |
| stale | Regenerate export | ✓ | A bundle exists but the selection changed since the last run. |
| failed | Retry export | ✓ | The last attempt errored; clicking re-queues the job. |
The state is shared between the inline view, the detail page and the status chip on the cases overview row, so a build kicked off from one surface is reflected everywhere.
Downloading the bundle
Once a build has succeeded, both the inline action bar and the Actions menu show a Download entry that streams the latest bundle straight from Vault. The button is hidden until the first successful build completes. Regenerating an export overwrites the previously stored bundle, so the Download action always serves the freshest version that finished building.
Sharing a case
The Share case action on the case detail page opens a modal that lets you invite external users (typically people without a Hub account, such as law-enforcement officers or insurance agents) to review the case via a time-limited link.
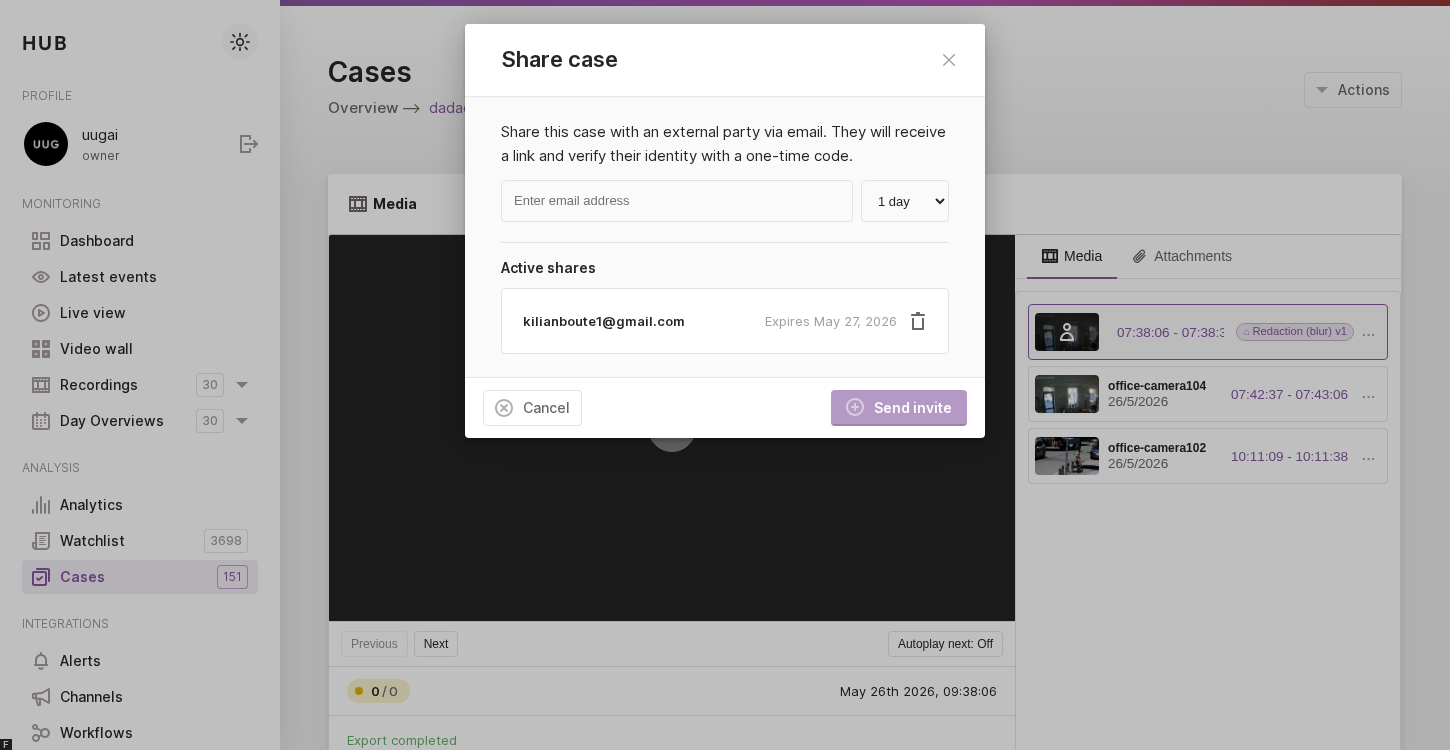
The Share case modal lets you invite external reviewers to a case via a time-limited link, and revoke any existing shares.
To create a new share:
- Enter the email address of the person you want to give access to.
- Pick an expiry for the link — 1 hour, 24 hours or 7 days.
- Use the Media and Attachments tabs at the top of the modal to curate exactly which recordings and which attachments the recipient will see. The two tabs mirror the Include in share (S) checkboxes from the playlist and attachments panel, and let you review the selection before sending the invite. A per-share snapshot of the selection is stored on the share itself, so later changes to the case selection do not retroactively affect already-issued links.
- Click Send invite. Hub generates a unique share link
(
/share/<token>) and emails it to the recipient. After opening the link, the recipient requests a one-time verification code from the share page itself; Hub then sends that code in a separate email, and entering it opens the case. The new share is added to the Existing shares list below.
The Existing shares section lists every active invitation with the recipient’s email and the expiry date. Clicking the trash icon on a row revokes that share immediately — the link and verification code can no longer be used to open the case.
On the recipient’s side, the shared page shows the curated playlist and an Attachments block listing every attachment included in the share, each with a one-click download link. The shared link only exposes the recordings and attachments included in the share’s own selection snapshot.
Note: Shared links only grant access to the case itself (recordings, attachments, description). They do not give the recipient access to the rest of your Hub account, and they require both the link and a verification code — which the recipient requests from the share page and receives in a separate email — to open the case.
Configuration
To start using cases some configurations need to be enabled on Vault and Hub, before you can use it.
Create archive storage provider in Vault
To use cases and the archiving process, an additional storage provider must be created in Vault.

Create a new storage provider for archiving in Vault.
To set the archiving retention period, a new Vault account must be created, since the retention period is defined at the account level. Recordings copied to the archive storage provider will inherit the retention period from this account.
Define a retention period in a new Vault account.
Define archive provider and account in Hub
Now that your Vault instance is configured for archiving, you need to tell Hub where to archive recordings — which provider and account to use. Open the values.yaml and locate the kerberosvault section. Here you will find the archive property.
# We have a Vault component installed which contains all the
# recordings. Vault is queried to retrieve the recordings
# from the appropriate provider.
kerberosvault:
uri: "https://api.storage.yourdomain.com"
accesskey: "xxx"
secretkey: "xxx"
provider: "a-provider"

# Archiving is used when creating a case. The underlying recording of the case will be copied from its
# existing provider to the below archived provider. Seperate credentials are used, as it makes possible to
# specify another retention period.
archive:
    accesskey: "xxx"
    secretkey: "xxx"
    provider: "an-archive-provider"
Set the accesskey and secretkey of your newly created Vault account, and specify the name of the archive provider. Then apply the updated helm chart.